
Connecting your WelcomeScreen account to Guesty is quick and easy, allowing you to manage your listings seamlessly. Just follow these steps to sync your systems and streamline your operations:
Step 1: Sign up for WelcomeScreen account, If you have already registered, login in to your account.
Step 2: After signing up/logging in, you will be asked to Set up your account. You will have two options. You can click on the “PMS Integration page” link shown in the highlighted section. This will redirect you to the PMS integration section, where you can automatically sync and import your listing details.

If you are not using a PMS, you can add a listing manually by entering the listing name under the listing column and then the listing address. Once done, click on “+ Add Listing”, and your listing will be added successfully.

You can add additional listings from the Listings tab by clicking on “+ Add Listing.”
Step 3: Before proceeding, please log in to your Guesty account in a new tab, as you need to generate Integration token in it.
Step 4: Once you login, you will be able to see the screen as shown below. Click on Integrations in the top right.

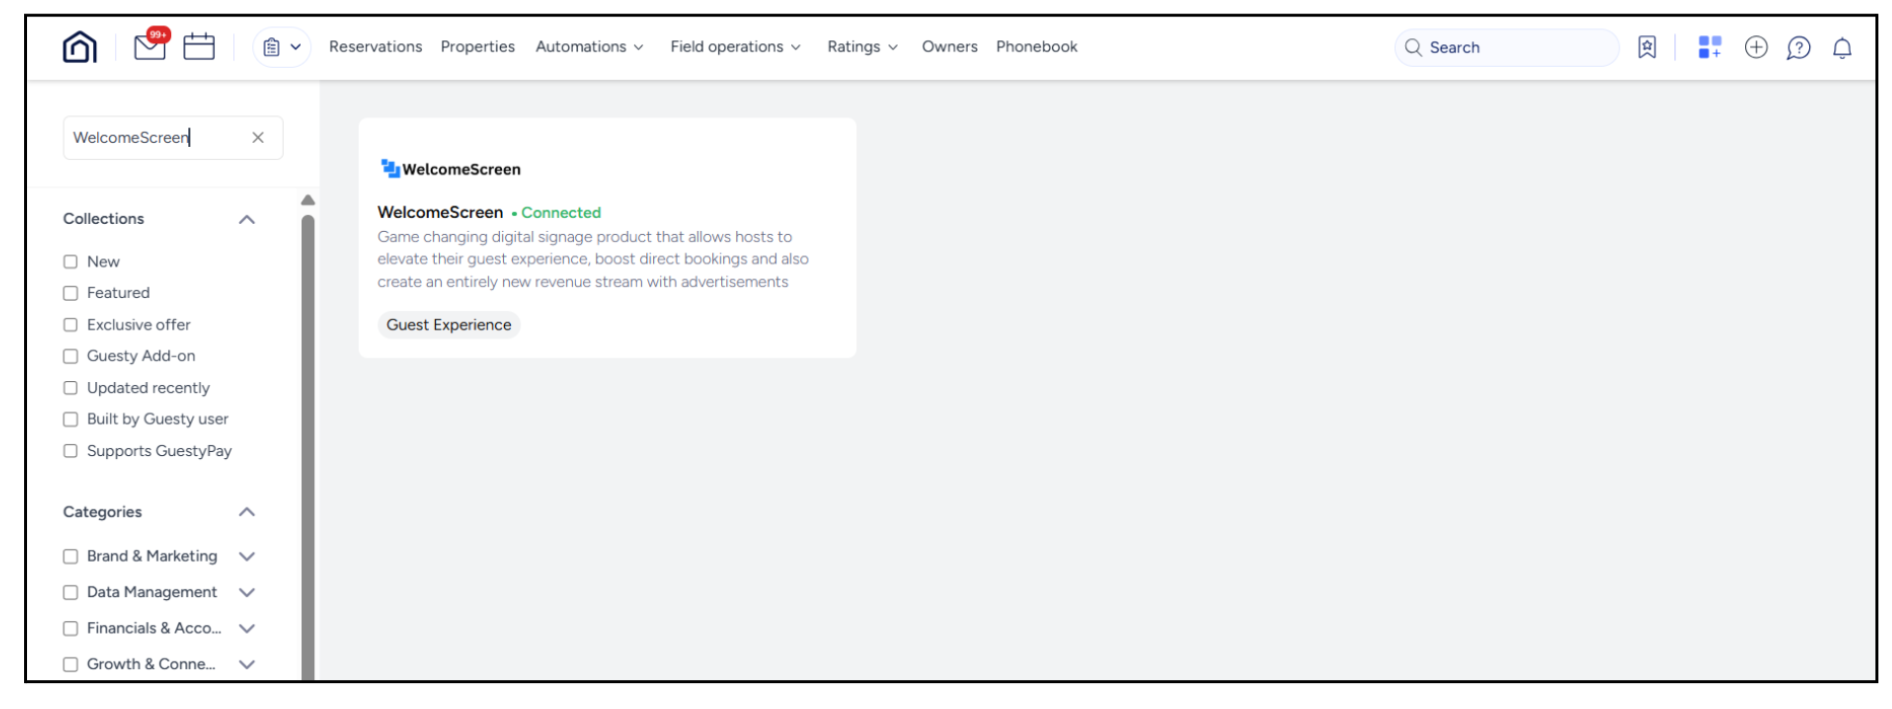
Step 5: After clicking on Integrations, you'll see a list of options—click Marketplace.

Step 6: Once the app is open, locate the search bar on the left and type “WelcomeScreen” to quickly find the app.
If you don’t see the WelcomeScreen app in the search result, you can go to this URL as well - https://app.guesty.com/integrations/partners/welcomescreen .
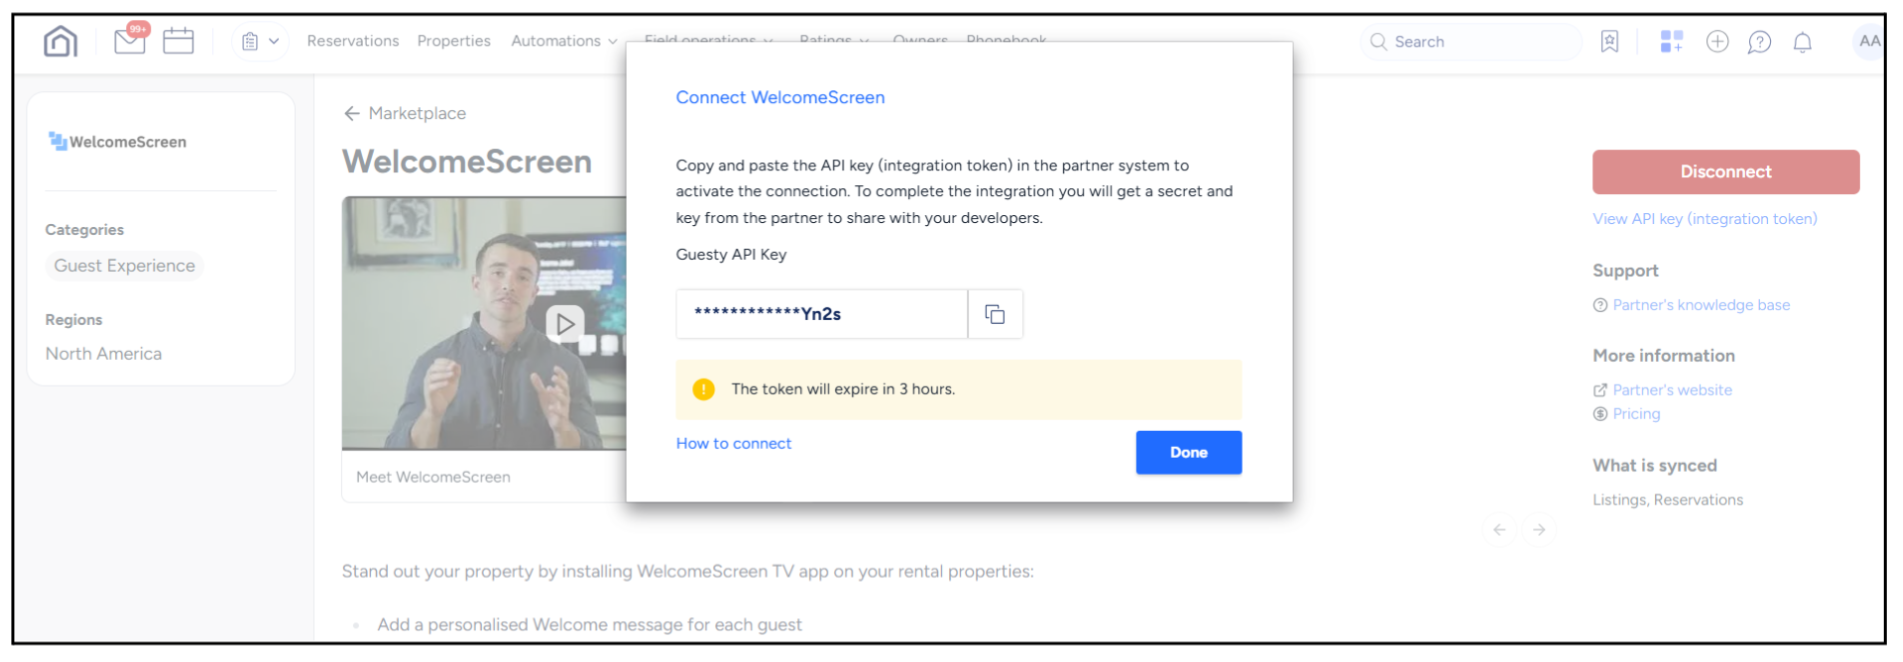
Step 7: Click on the link, and you’ll be taken to a screen like the one shown below. Next, click the “Connect” button located at the top-right corner to link your account.

Step 8: Click on "Connect," and once you do, the Guesty API Key will appear. Copy it.
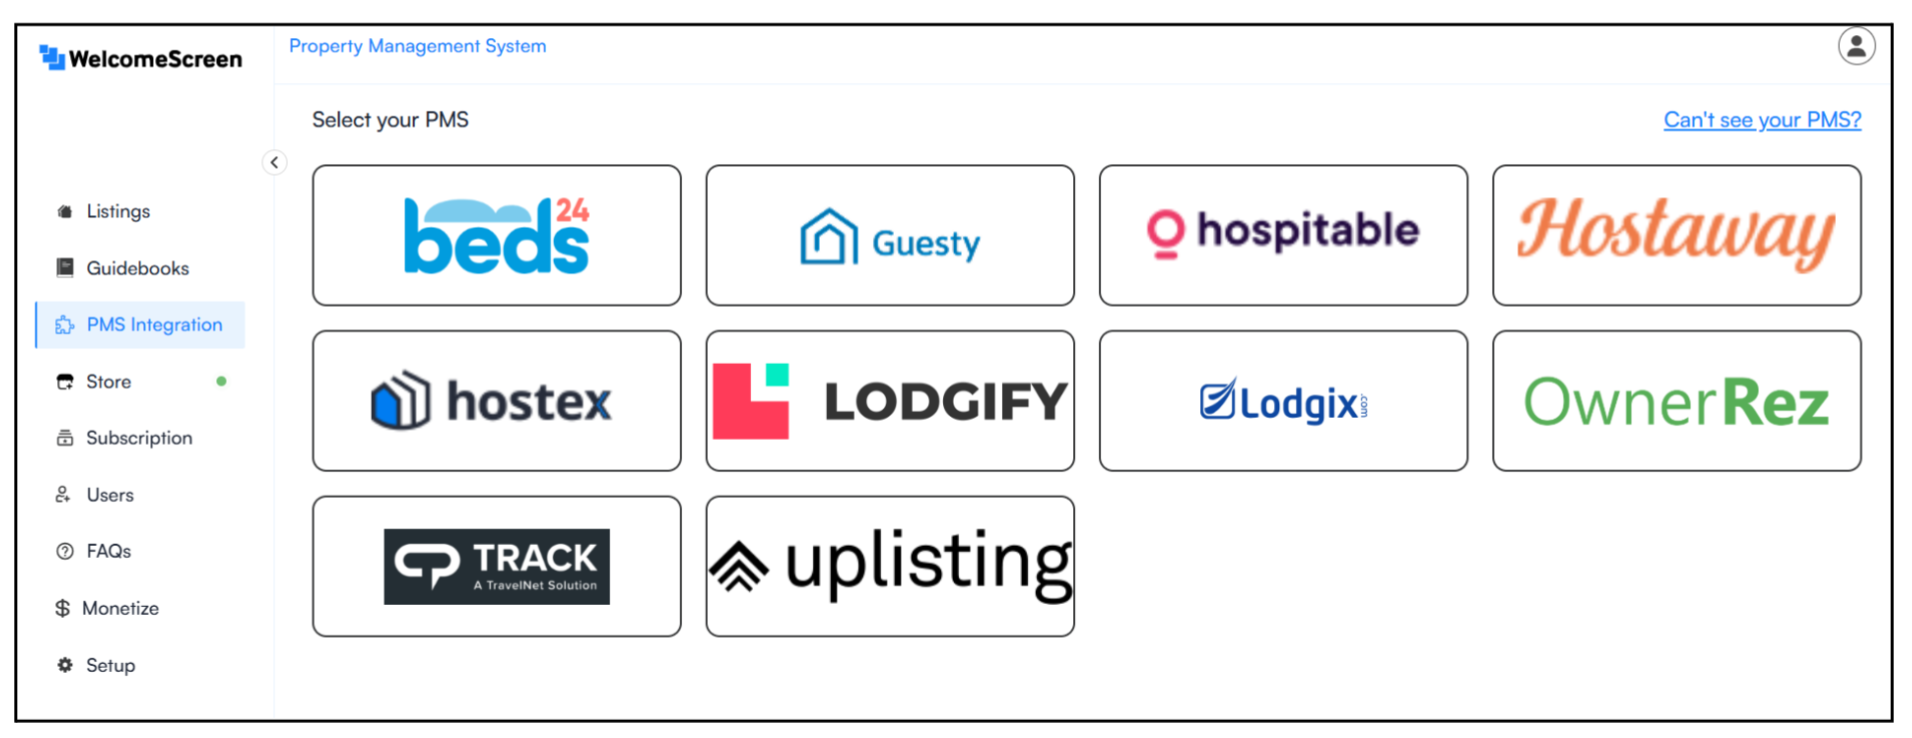
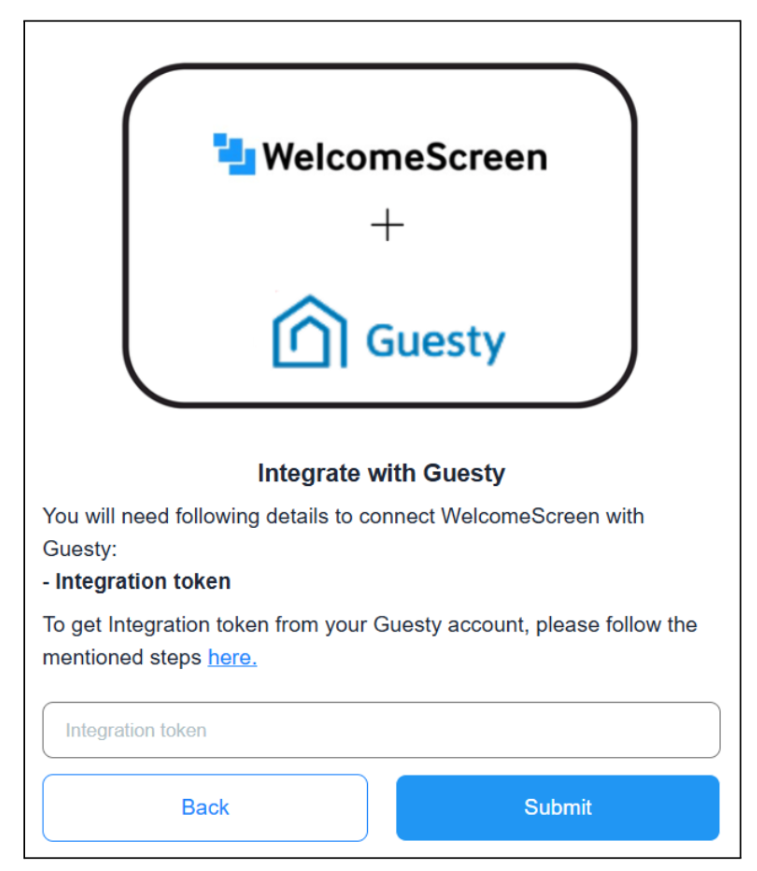
Step 9: Return to WelcomeScreen, click on “ Sync Listings” and then select Guesty from the PMS list.
Step 10 : After selecting Guesty, you will see a screen like the one below. Click on "Continue."
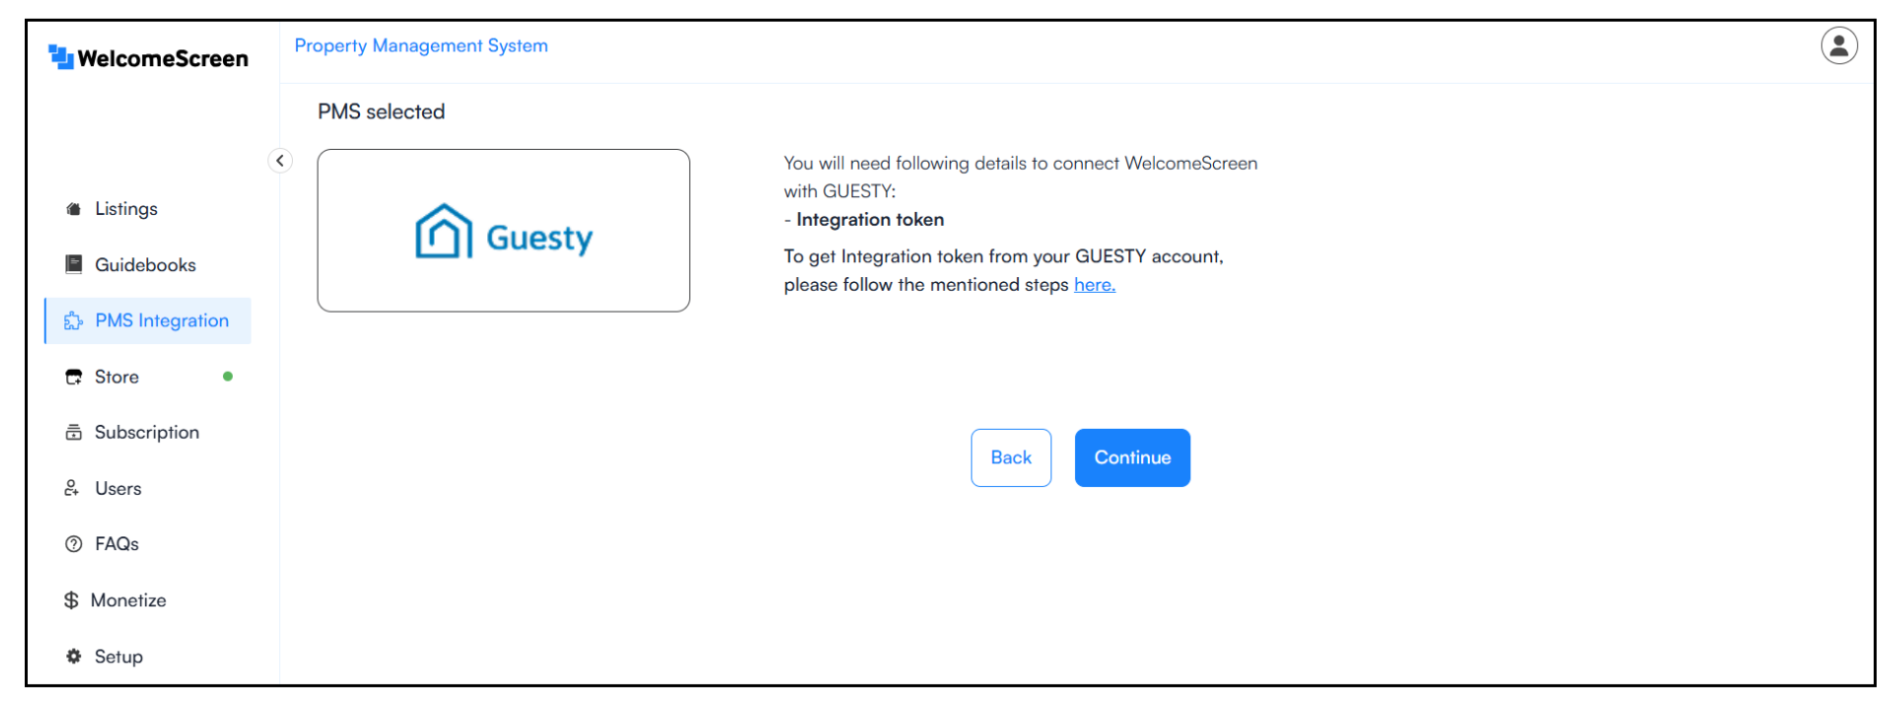
Step 11 : Paste the API Key which you had copied and click Submit to complete the connection.
Once the connection is established, you’ll be redirected to the WelcomeScreen app, where you can efficiently manage your listings through Guesty PMS.
If you encounter any issues or have questions, feel free to reach out at support@welcomescreen.com.

.png)
.png)
.png)


