
Before adding Vendors to your store, you need to first create your store in the WelcomeScreen portal. Follow our Store Creation Guide to get started.
Once your store is created, the next step is to configure the necessary settings. You can refer to our Store Setup Guide to complete the setup.
A Vendor in the WelcomeScreen Store represents a supplier who provides products or services listed in your store. Adding vendors helps you organize suppliers, assign them to products, and manage vendor-related information efficiently from one place.
The WelcomeScreen Store allows you to collaborate with vendors who can supply products or services directly to guests.
There are two ways to create a vendor.
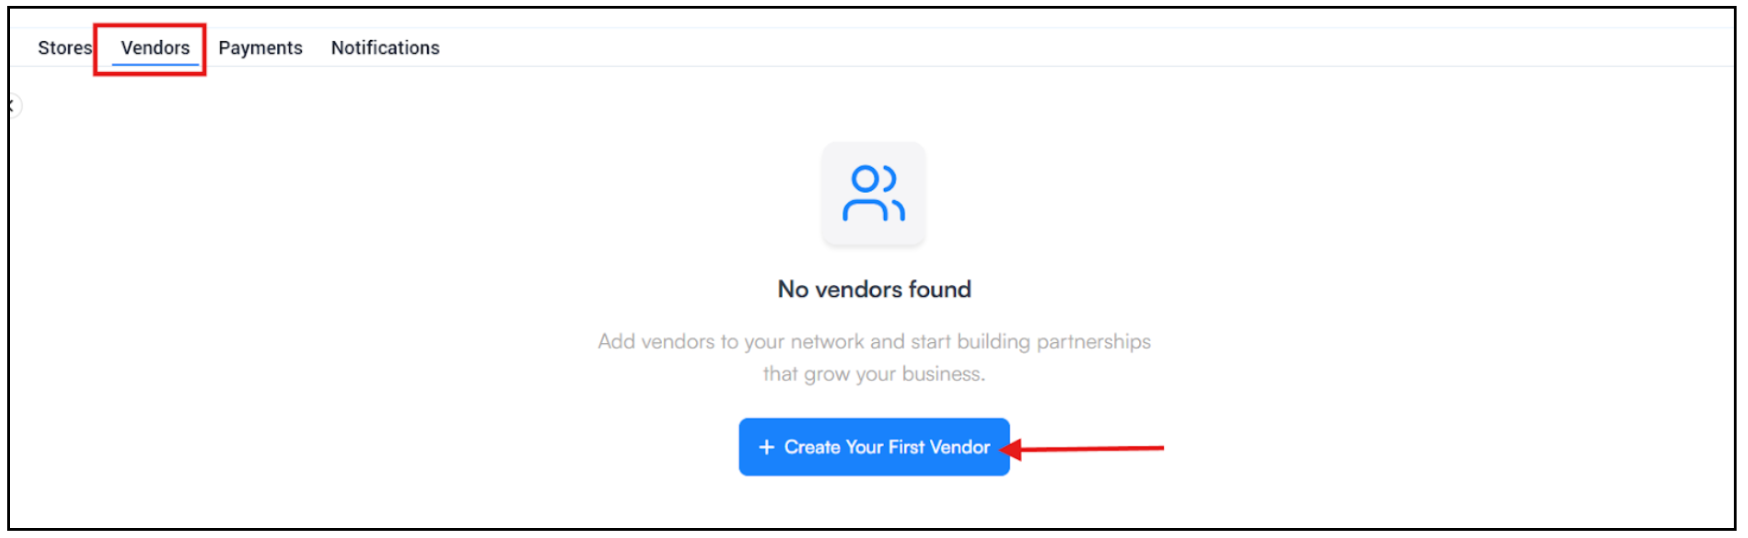
A. Create a Vendor from the Vendor Dashboard
The first way is to create a vendor directly from the Vendor dashboard.
> Navigate to the Vendors section in the dashboard.
> If no vendors exist yet, you will see the option “Create Your First Vendor.”
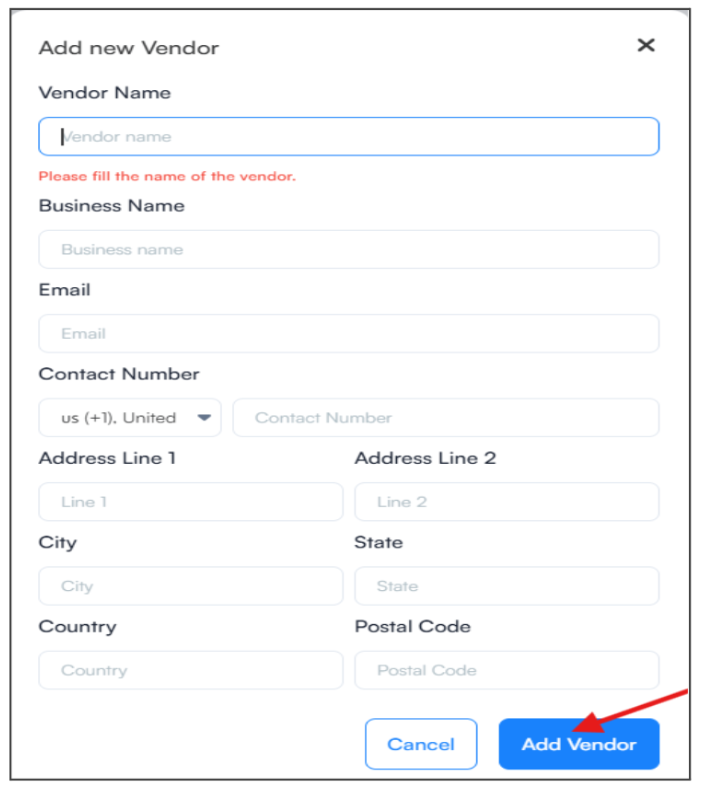
> Click the button to open the Add New Vendor form.
> Fill in the vendor details such as:
> Click Add Vendor to save the vendor.
Once created, the vendor will appear in the vendor list and can be selected when assigning products.
This method is useful if you want to set up all vendors first and link products later.
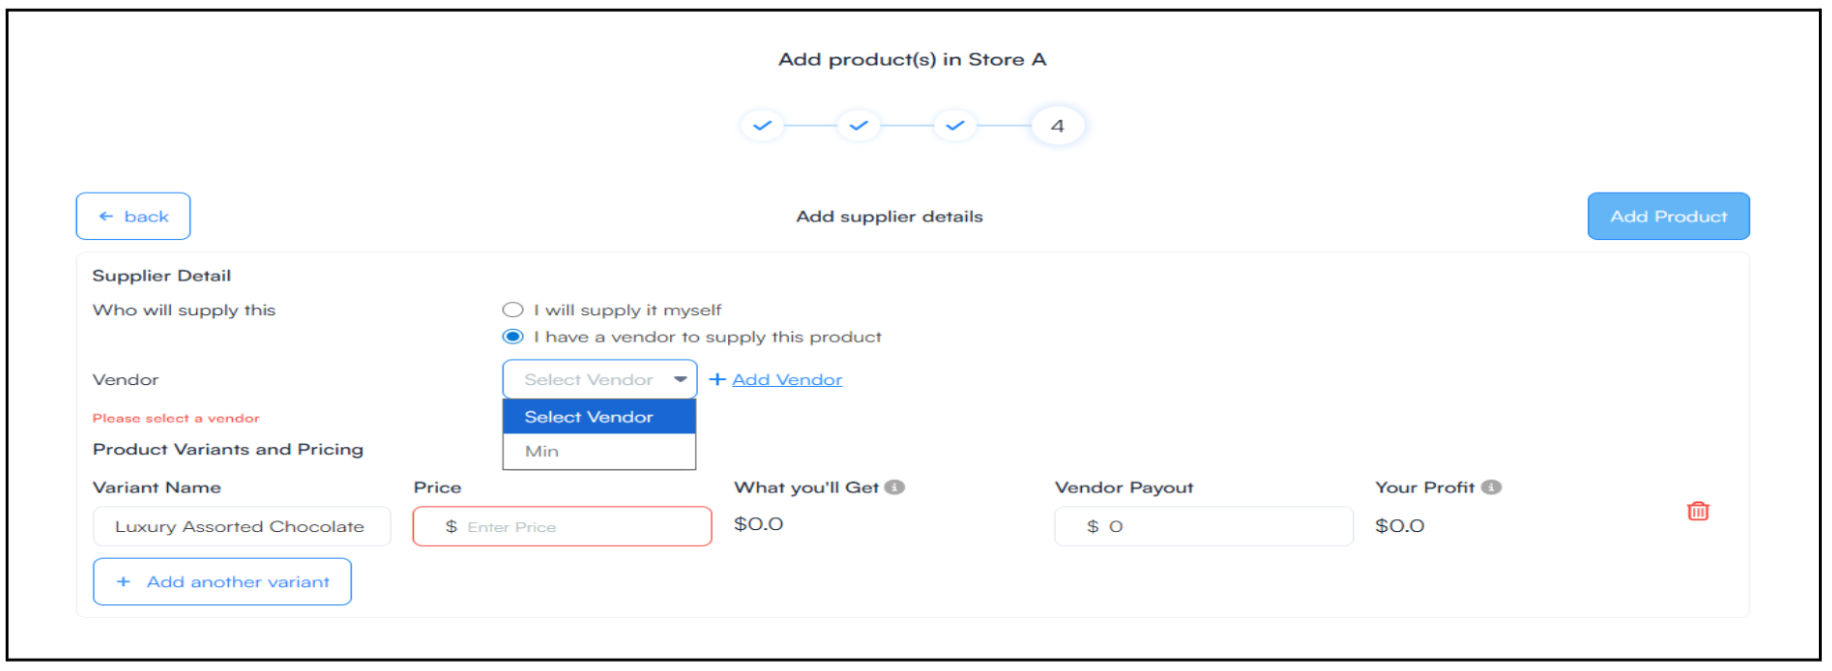
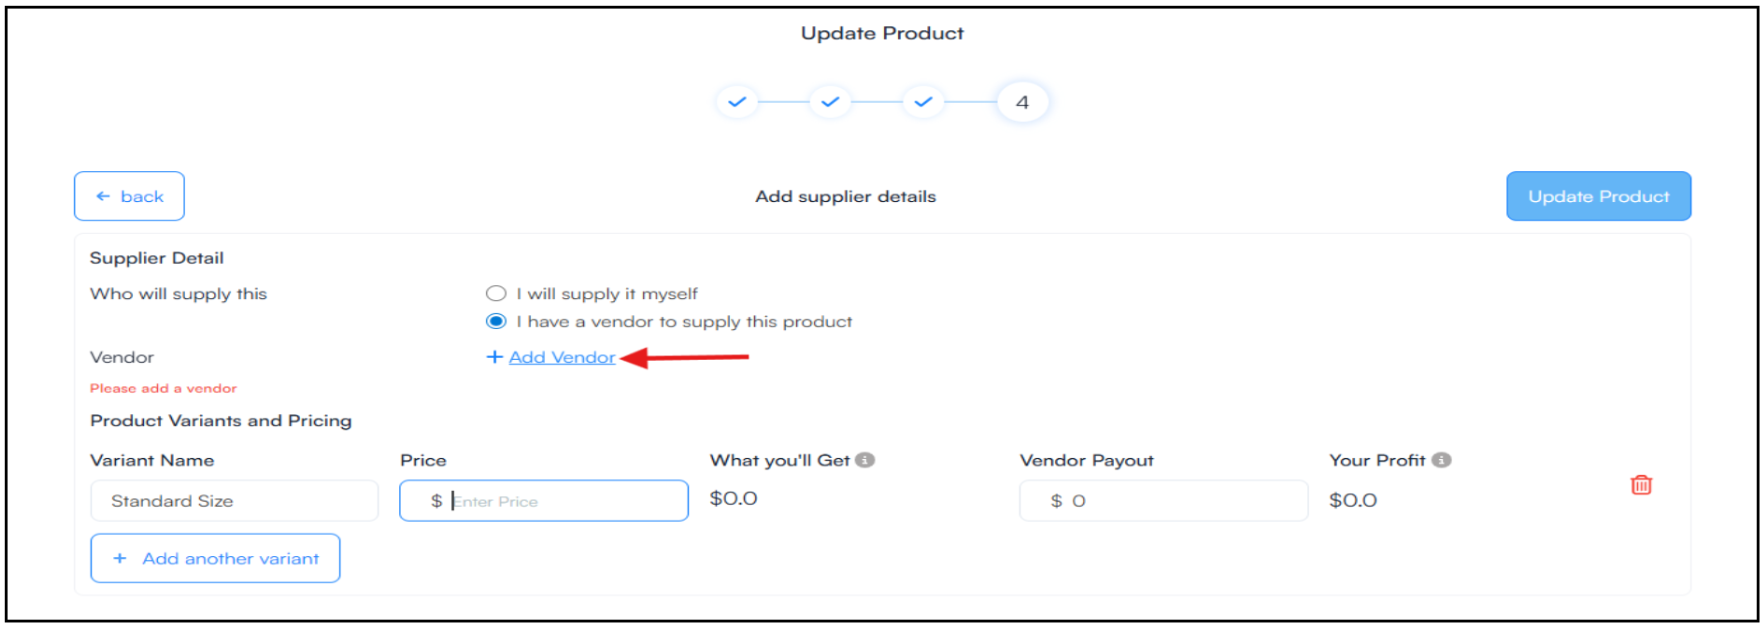
B. Create and Assign a Vendor While Adding a Product
You can also create a vendor during product setup.
The new vendor will automatically appear in the dropdown and can be assigned to the product.
You can also configure:
This ensures that both the vendor share and Your profit margin are clearly defined.
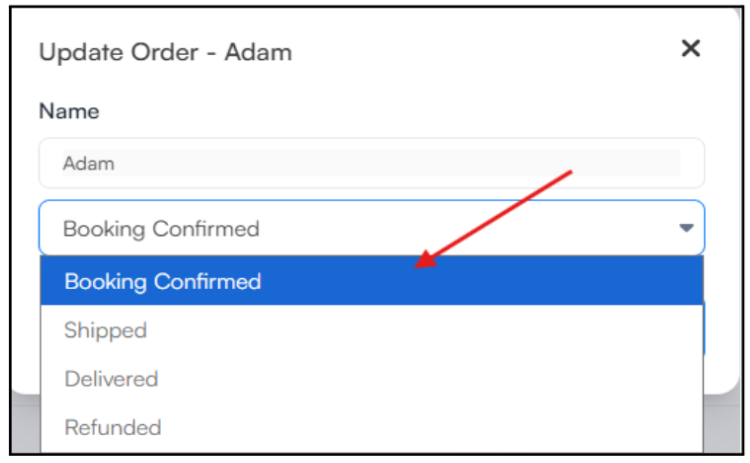
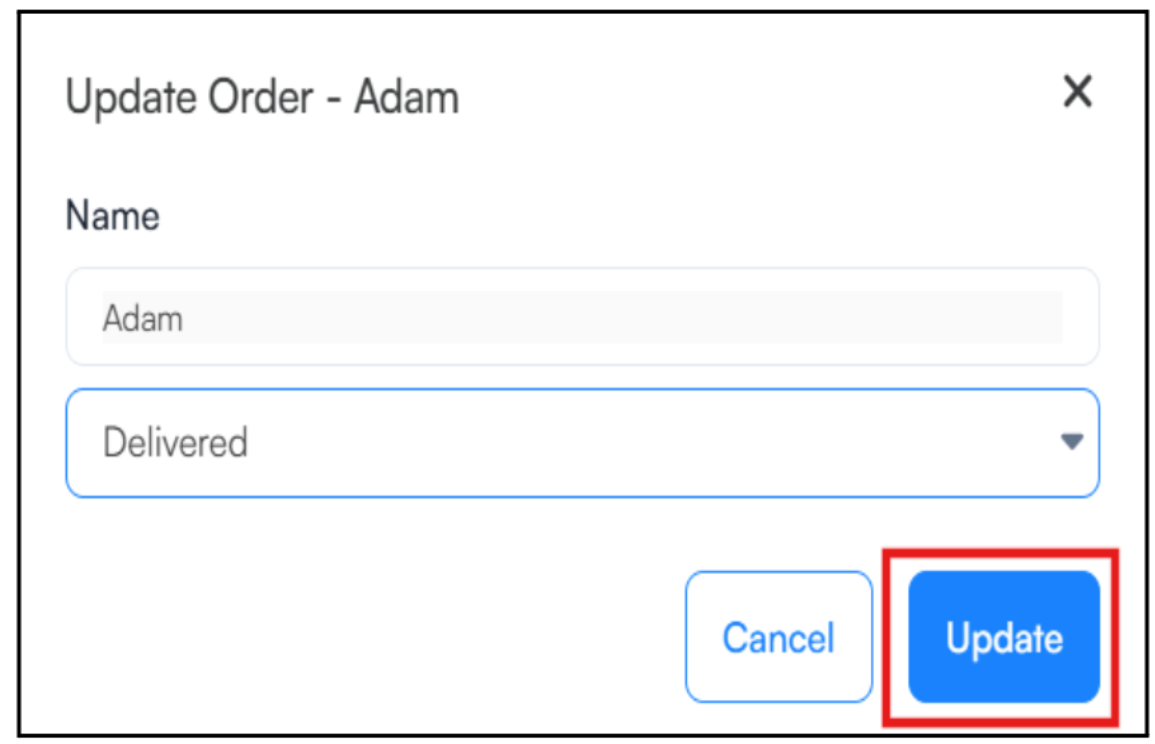
Orders linked to vendors appear in the Vendor Details section.
This section provides an overview of the vendor’s information along with the order history, including the store name, payment date, order amount and order status. This helps you to easily monitor and track all vendor-related transactions.
You must update the order status manually as the order progresses.
Typical order status flow:
Booking Confirmed → Shipped → Delivered
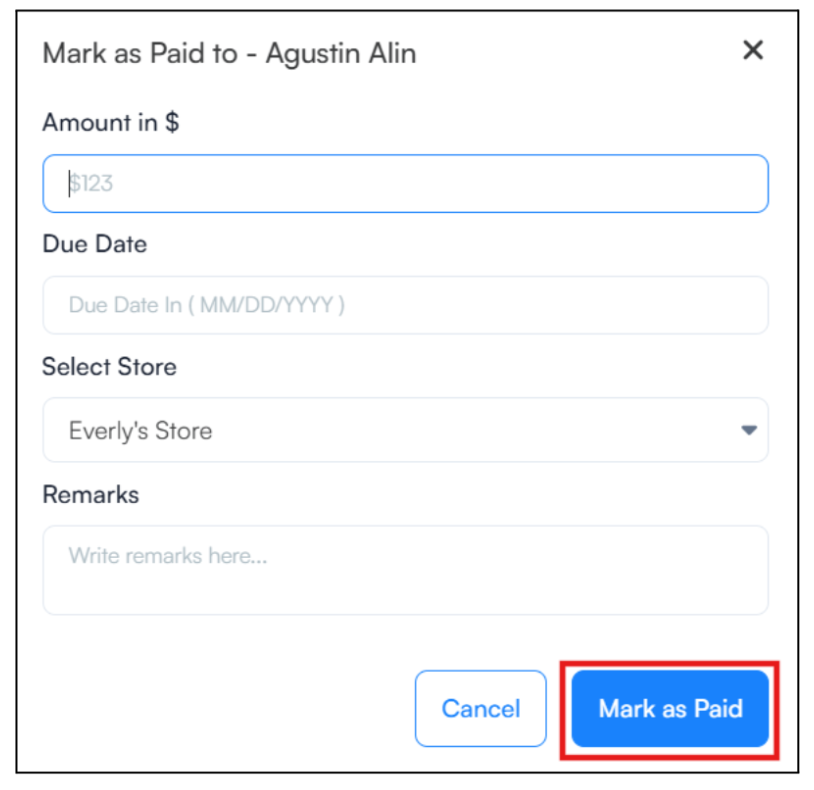
To process the payment, You can click the “Mark as Paid” button located on the top right of the Pending Balance section.
After clicking Mark as Paid, a payment form will appear where you can enter the required payment details such as:
This ensures vendor payments are properly recorded and tracked in the system.
Once vendors are added and products are available in your store, you can start receiving orders from guests. Learn how to manage orders and set up notifications in our Manage Orders and Notifications Guide.
For additional assistance or questions, contact the WelcomeScreen support team at: support@welcomscreen.com

.png)
.png)
.png)


